Locally Running an AI LLM Discord Bot
Recently I have started exploring the realm of local AI to see what is possible and what you can run on everyday hardware. I have a sever sitting around with some capacity and wanted to see if I could put that to use by running a LLM bot in my Discord for my friends.
My journey started by discovering the Ollama project through a recent Network Chuck video where he explains how easy it is to run a local LLM. What I didn’t realize before this was just how large the community of publically available LLMs is. Even Meta has made their trained LLM, llama2 (hence the name Kuzco, spoiler!), publically available after providing some totally legit requested information… Realizing all of this I thought to myself, wouldn’t it be neat to have the functionality of a conversational LLM bot in Discord for all my friends to use and ask questions of? Well of course!
Unraid Setup
That is where things got started and so my first mission was to get Ollama up and running on my Unraid server which was surprisingly easy since there is already a community application for their codebase.
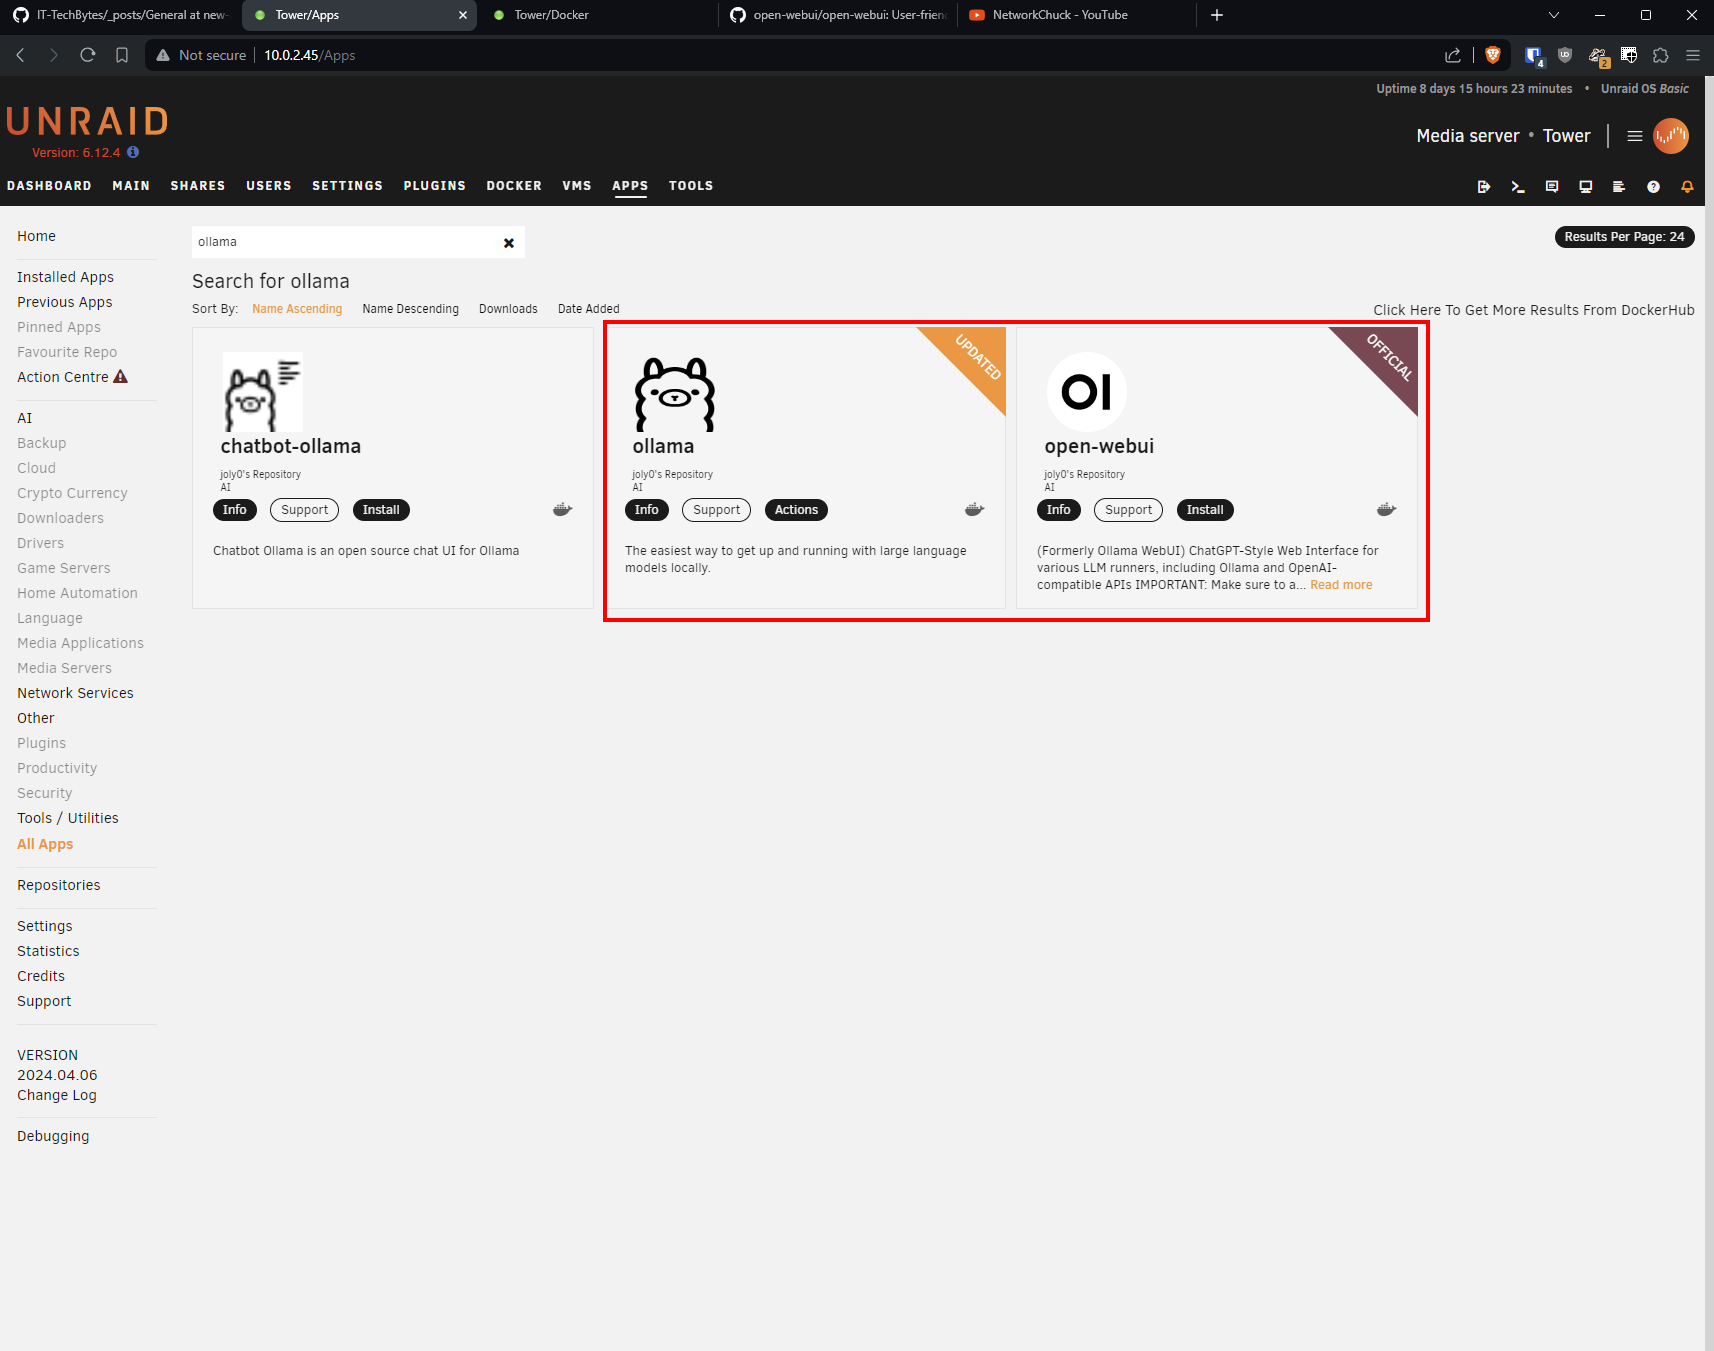
Navigating to the apps tab you can search for Ollama and grab this version. We are also going to need the open-webui container to make things a little easier and you can also test things out once you get Ollama setup before we get the Discord bot going.
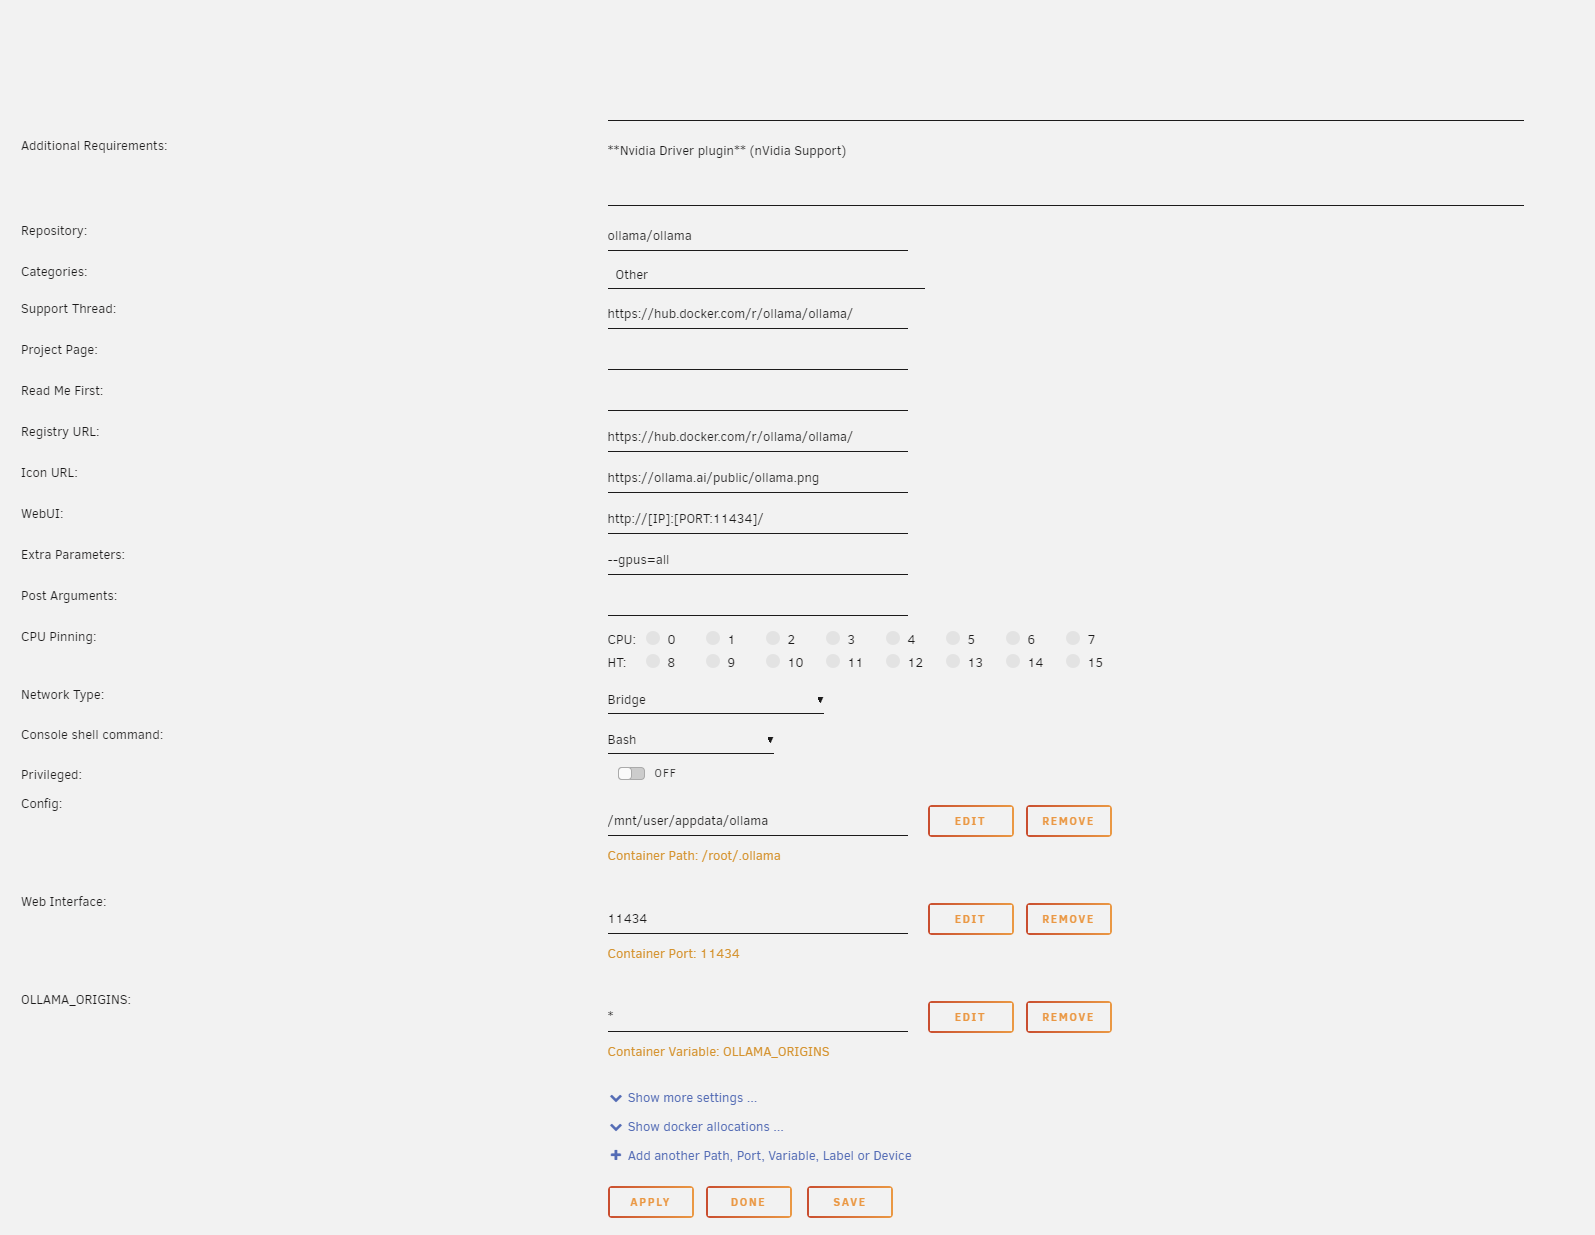
On the Ollama container setup give it whatever name you would like, configure the network as you need, and then make sure that the extra parameters has --gpus-all if you have an Nvidia GPU installed on your system. You can still run an LLM without a GPU, but the CPU will be heavily tasked and your responses from the LLM will have quite a bit of delay.
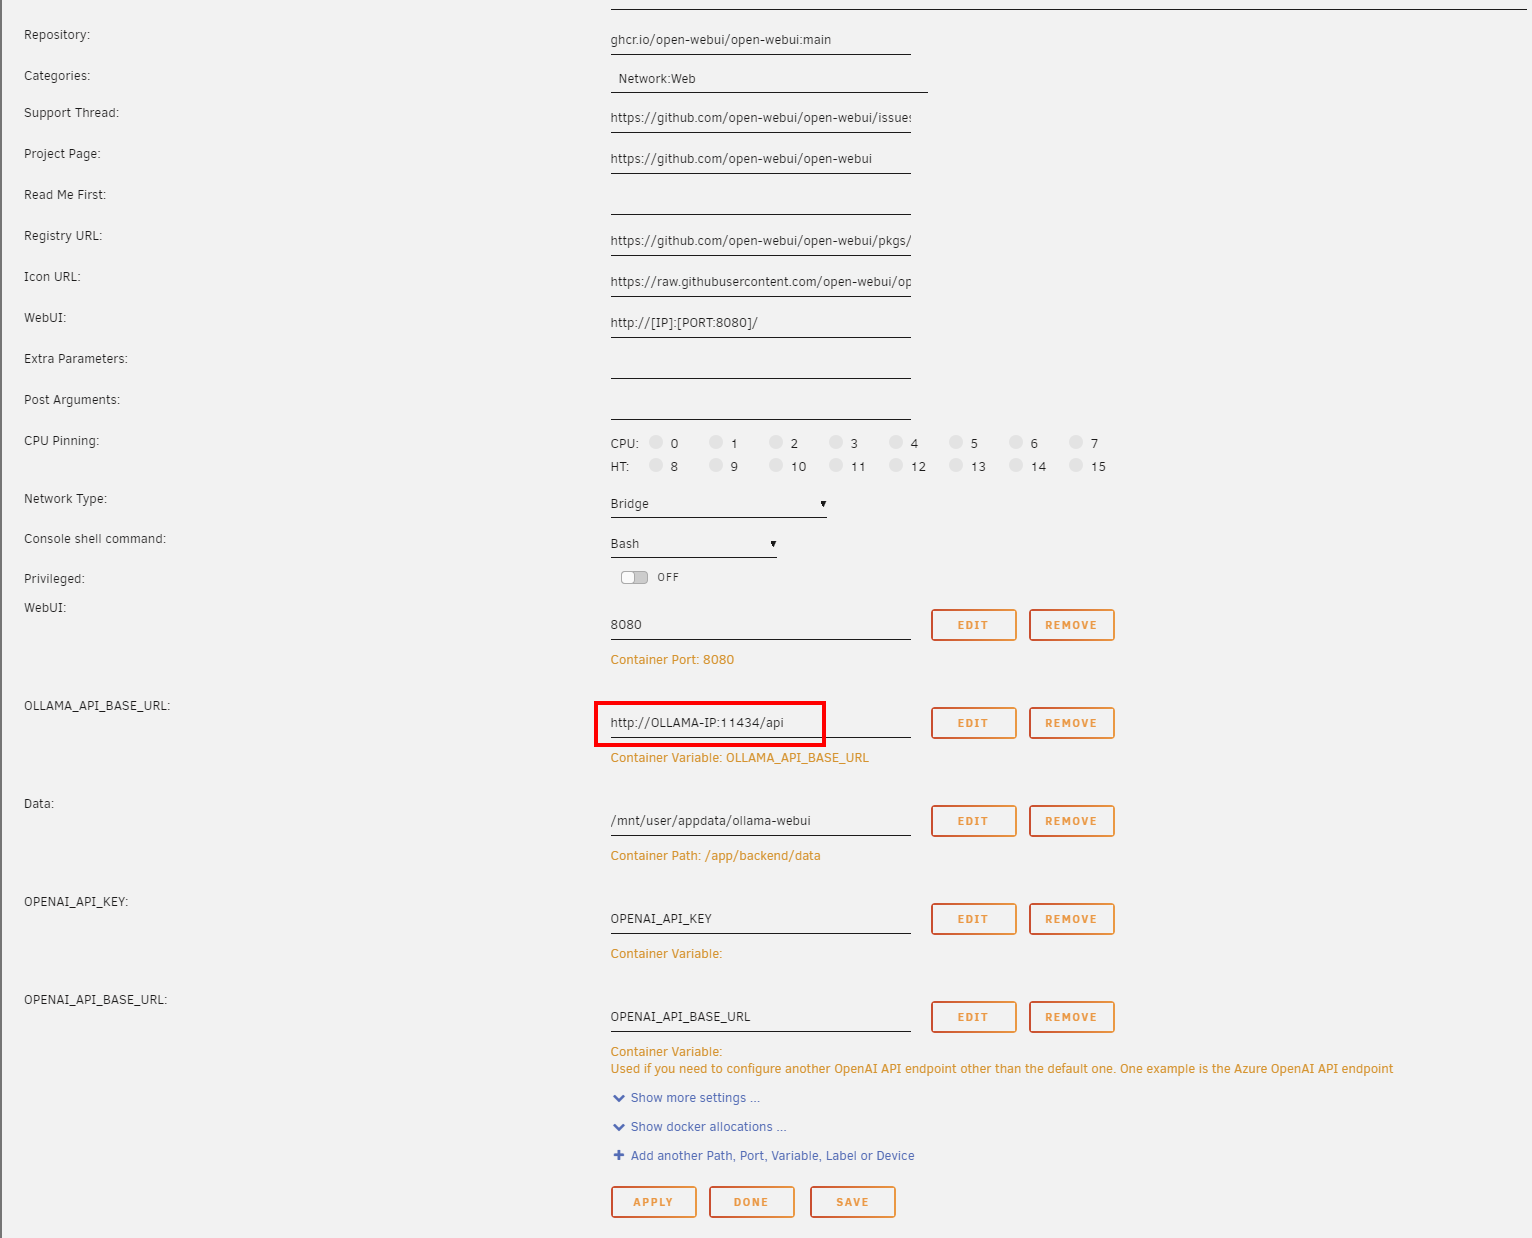
The configuration for the open-webui portion for Ollama is a super simple setup, we can keep all of the default configurations. You can change the name and networking as needed. The only piece we need to change is where it says OLLAMA-IP in the Ollama API Base URL variable to have our IP address of the Ollama container we set up before this. My IP is 10.0.2.45 so I am going to plug that in here.
Once the open-webui container is started, navigate to the web interface for it so we can grab an LLM for the Ollama container to use. When you first access the site it will ask you for a login. Don’t worry this is just a local account that you create for your running open-webui instance and will allow others to connect to this site as well and login to see their past conversation history.
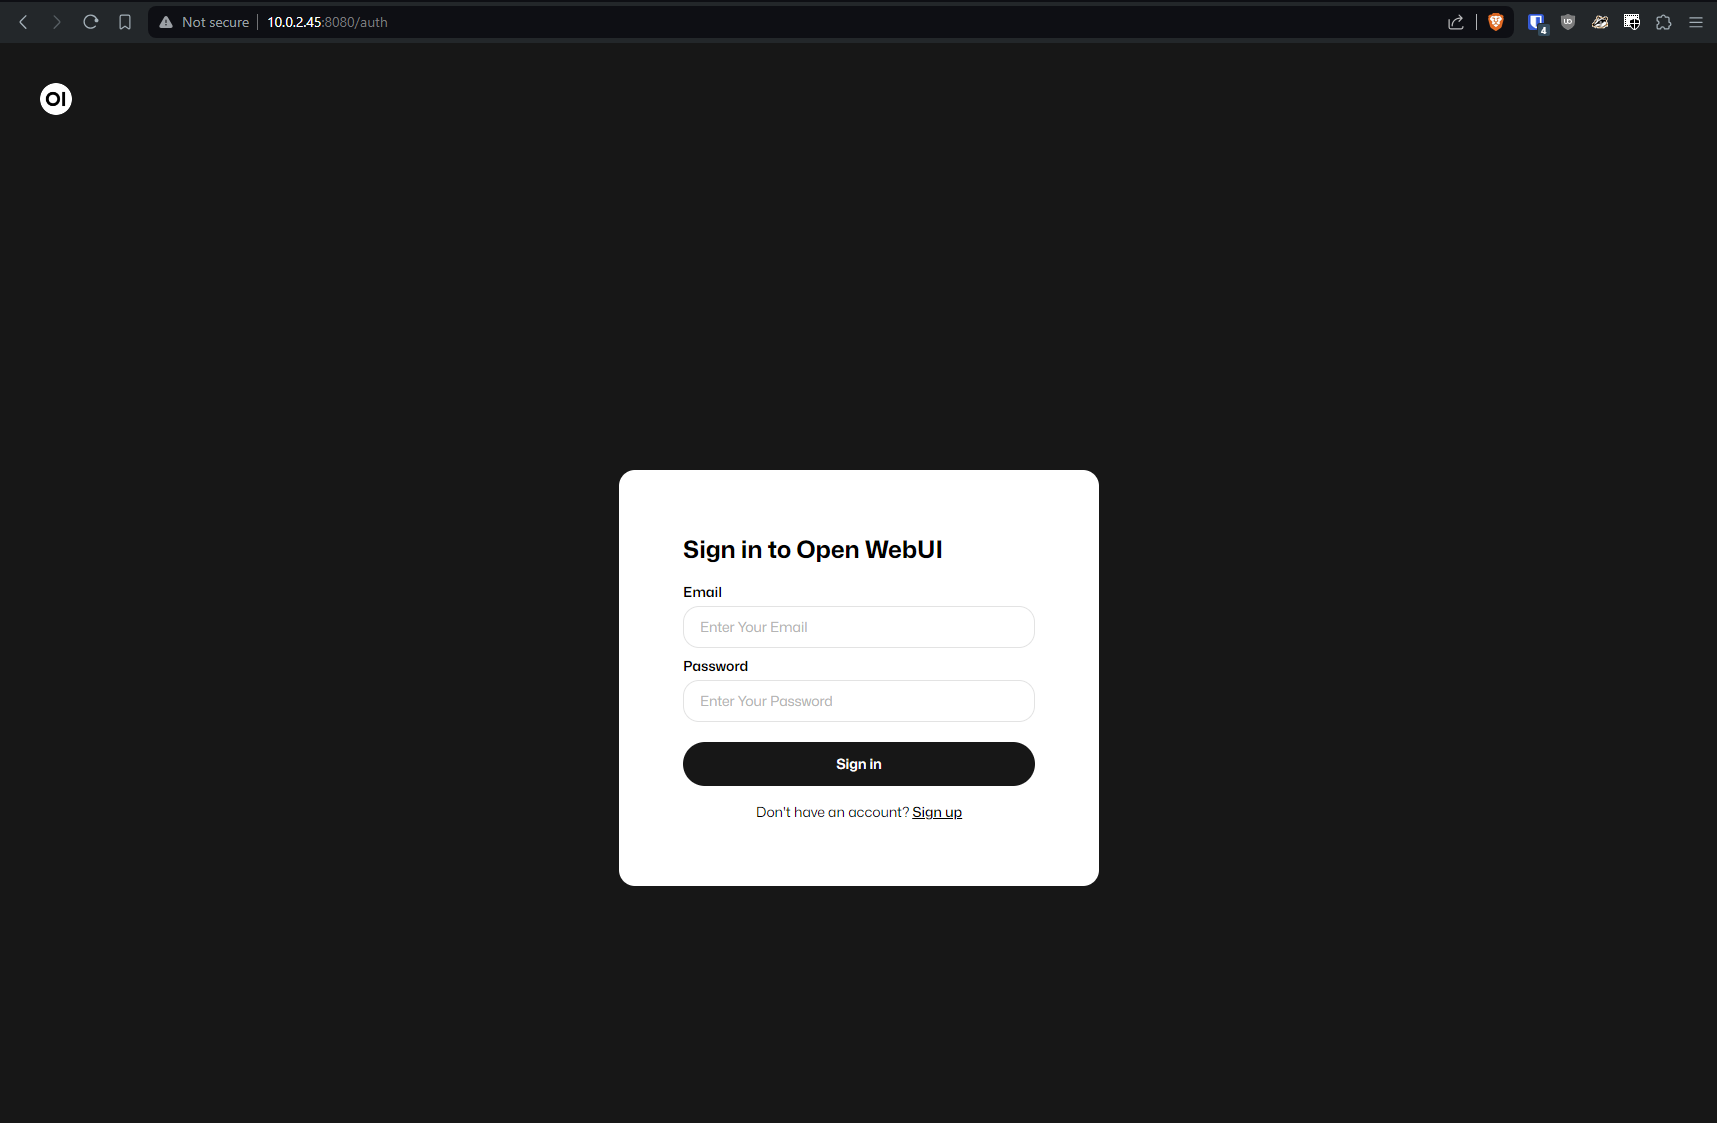
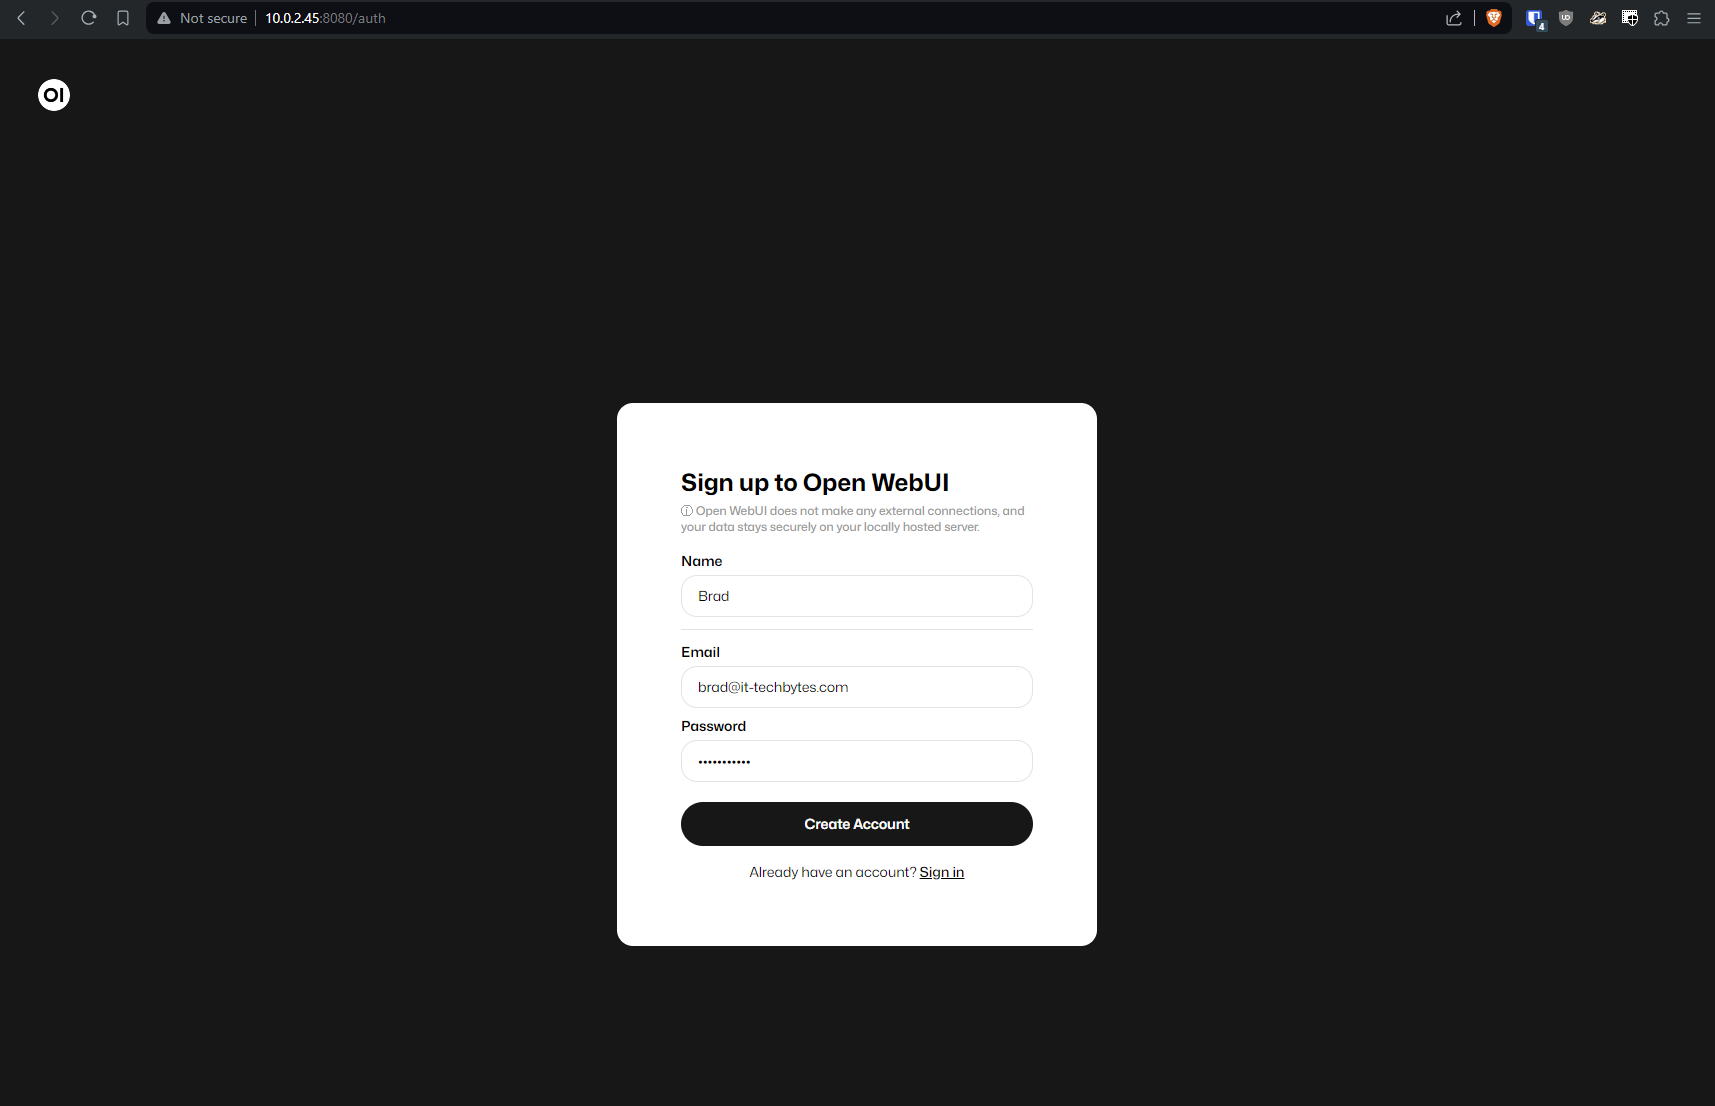
I am going to create a new account with some basic information. Note: The first account you create will be the admin account and will need to be used to approve any subsequent accounts that are created.
After you create your account you will be brought to this homepage. If you have used ChatGPT you will notice this interface is very similar, but there are some differences.
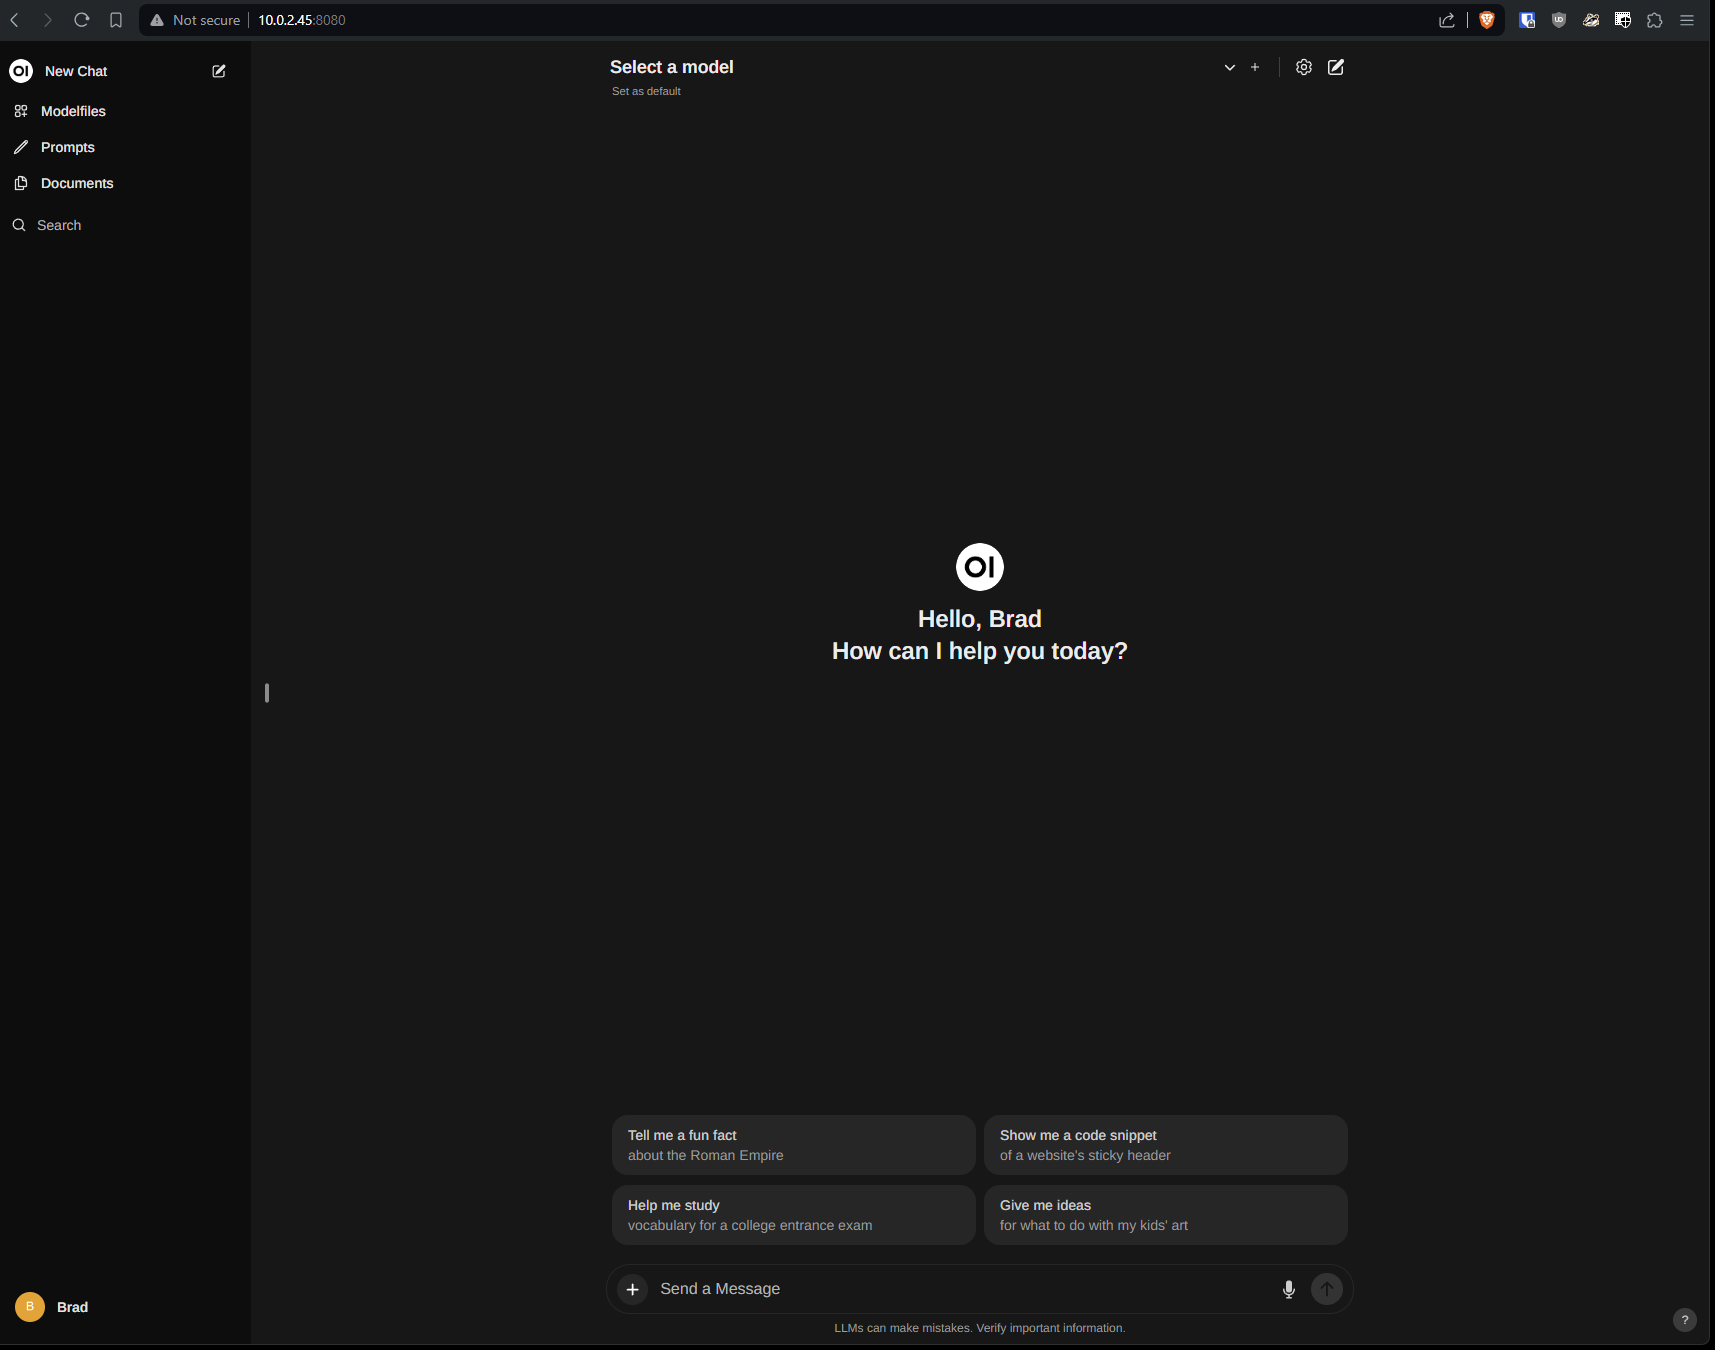
The most notable being that you have the option to select your language model at the top.
You can see I already have a model downloaded on my Ollama instance as I have already been running this. What we are going to do is download the latest llama3 that was just released a couple of days ago from Meta and we are going to test it out.
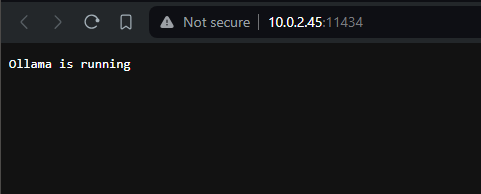
First though we need to make sure that our open-webui instance is actually properly connected to our Ollama container that is running. Make sure your Ollama container is running by opening the webgui for it. You should just see a page that says Ollama is running like this.
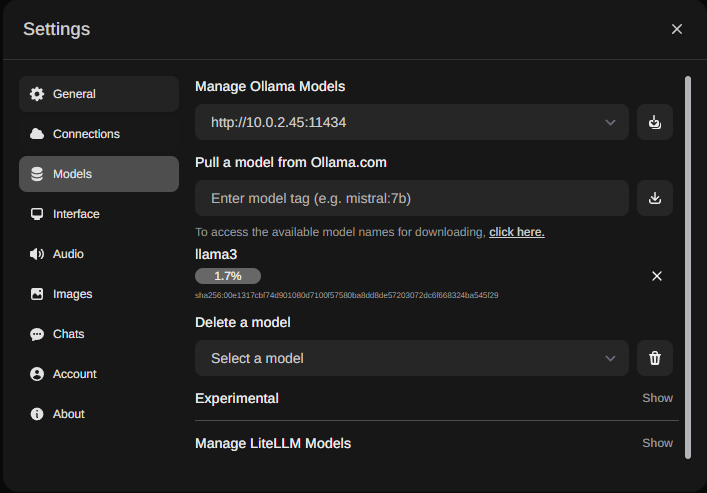
Next let’s go back to our open-webui page and select the settings cog next to the select a model prompt. Here lets navigate to connections and ensure that our Ollama instance is showing with the correct IP address for our container. You can click the refresh icon and it should prompt with a successful connection.

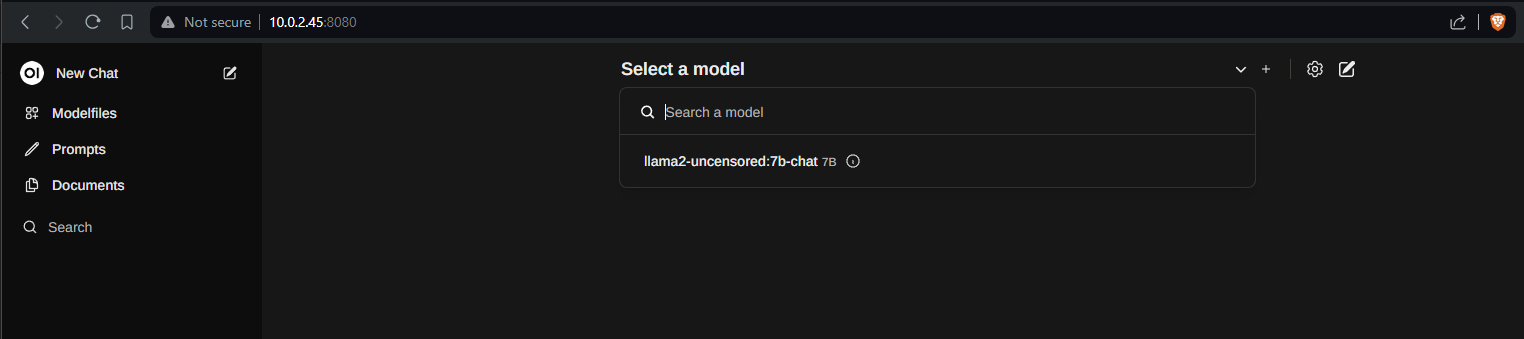
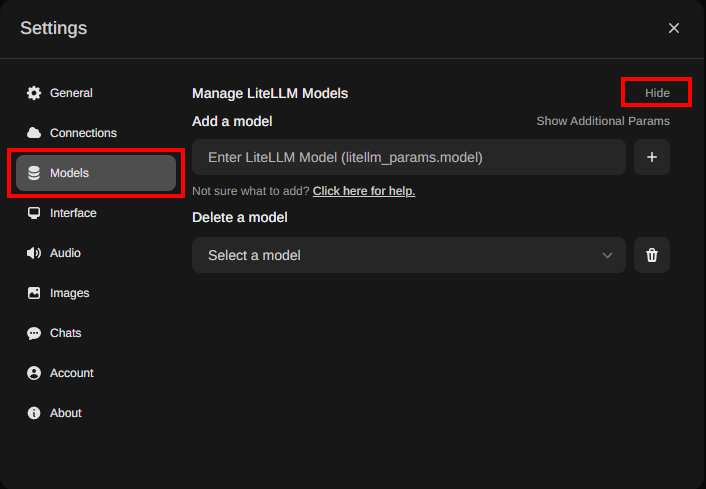
After we confirm that, let’s go to Models in this same settings page and here we will have the option to manage our models and download new ones to use. Click on the link that is listed under “pull a model” to see what models Ollama supports. For our purposes we are going to grab llama3.
Click the download icon and you will now see that it is grabbing this model for you to use.
Once the model you want is downloaded exit the settings screen and go back to the New Chat prompt. At the top if you select the Select a Model drop down you will now see you have another option for your newly acquired language model.
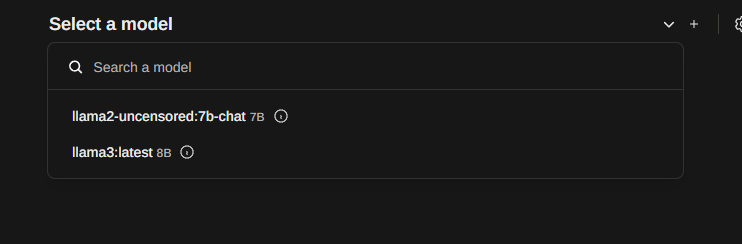
Lets select llama3 and give it a try and see if we can get a response from it. After you input your prompt it will start processing on your Unraid server. Depending how powerful your hardware is will either process this quickly, or it will take a couple of minutes to respond to your prompt.
This is sweet! Now we have a locally running LLM that we can interact with through our web browser and ask it all sorts of questions in private without any of that data making it to the cloud or being stored and used to train other AI models. Depending on how you have your Unraid networking setup at home, you could provide this link to anyone in your house to create an account and use instead of ChatGPT. I would probably avoid making this publically accessible though, I am not sure that the authentication is robust enough for that.
Let’s move on now to the fun part, integrating with Discord!
Discord Integration
There are two parts to this process. One will be getting the bot created in the Discord developer portal and second will be setting up the docker container that will interface with Ollama and “run” the Discord bot.
Discord Developer Setup
To set up a discord bot you are going to need to grab a token from Discord and then also authorize your bot to be added to your server. You will need to make sure you have the correct Discord admin privileges to be able to do this.
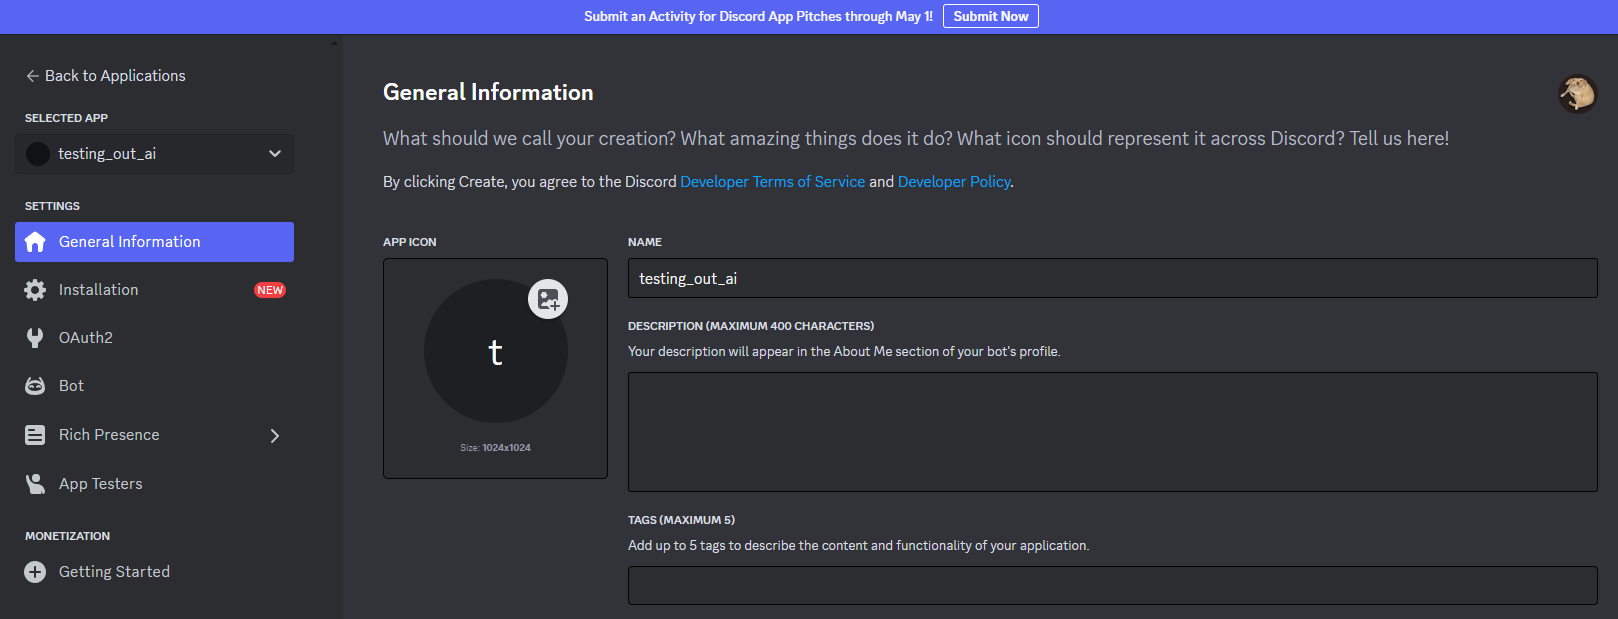
First navigate to the discord developer portal https://discord.com/developers/applications and login. From here you will want to create a new application and give it a name. You can also add a profile pic and a description here that will be shown in Discord.
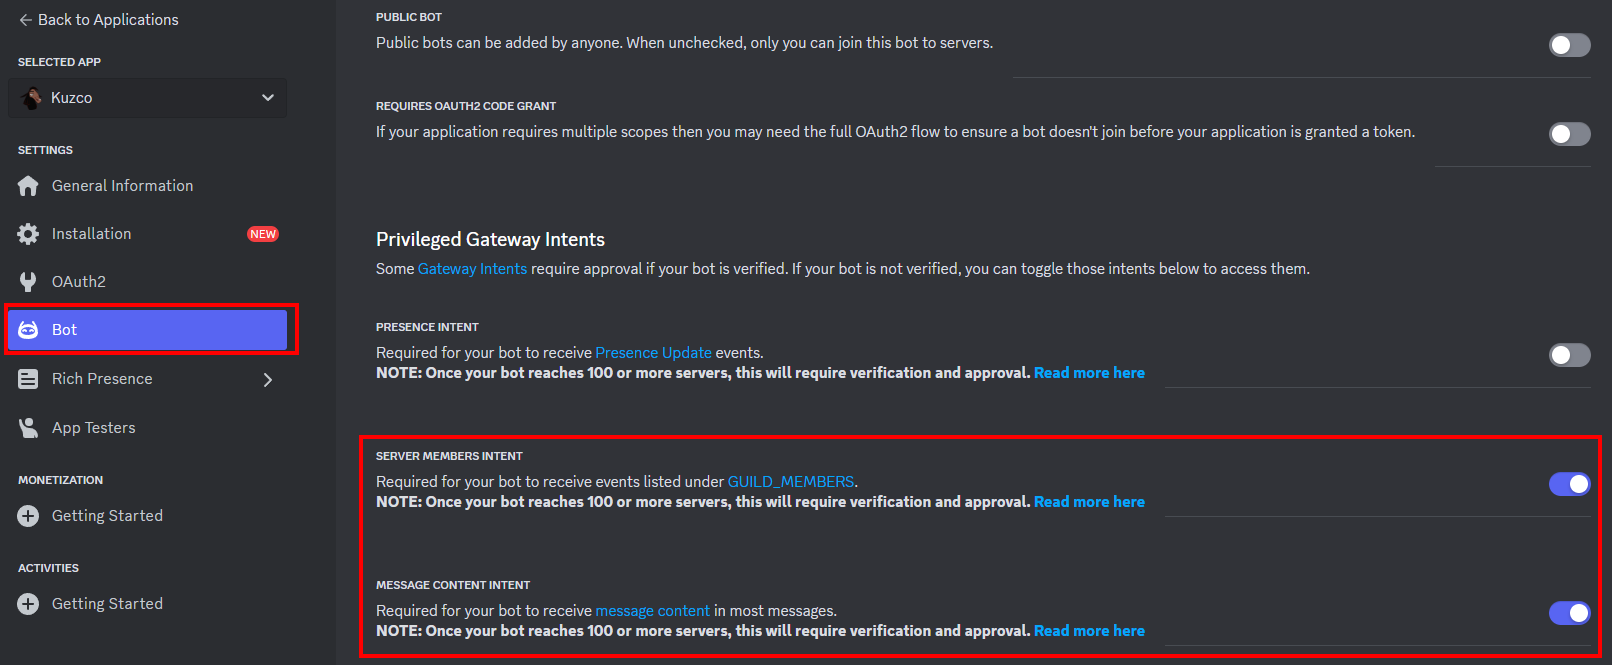
Under the bot settings tab make sure these two options are selected.
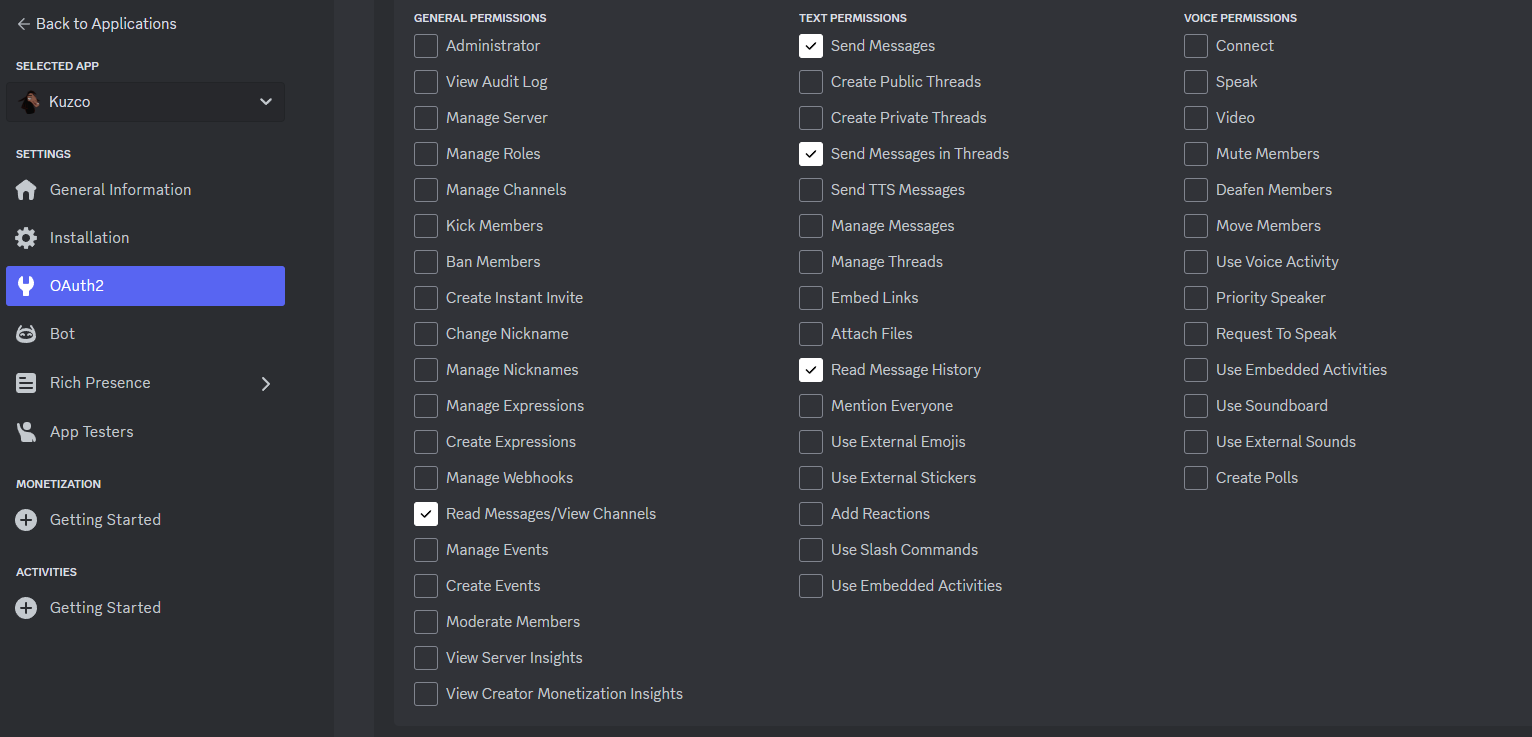
Under the Oauth2 settings select bot and then under that select these options.
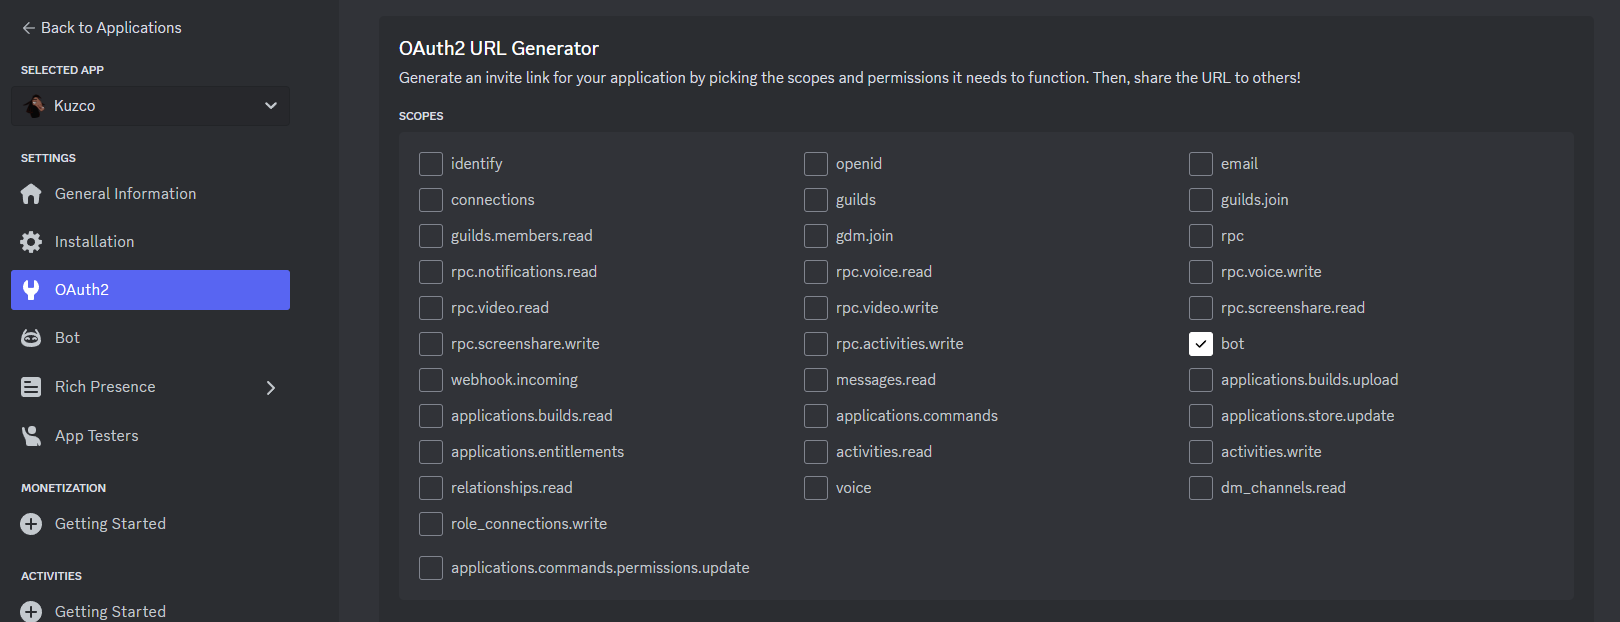
At the very bottom there will be a URL that is generated. Paste that into your browser and it will ask you to login to Discord and add your bot to your server. Add it to the server you would like and then make sure that it has the correct permissions on that server to read/send messages from the chat channel you want to use the bot in.
Discord Bot Docker Container Setup
So we have our local Ollama instance running and we can ask it questions via the open-webui on our home network but since we don’t want to expose this to the internet, how can we get other people using this too? Well thankfully mekb-turtle has already done most of the heavy lifting for us with their discord ai bot framework. This code was specifically designed to interface with Ollama and Discord to run a bot for your friends but there are a couple of modifications that I had to make to the code so that I could run it on my Unraid server rather than have it always running locally on my desktop.
You can view my fork of the project if you would like to pull it here. The changes that I made were to the Dockerfile so that it would support variables being passed from Docker into the script and some changes that were causing errors when I was running from the docker container.
You can pull the docker image from docker hub here
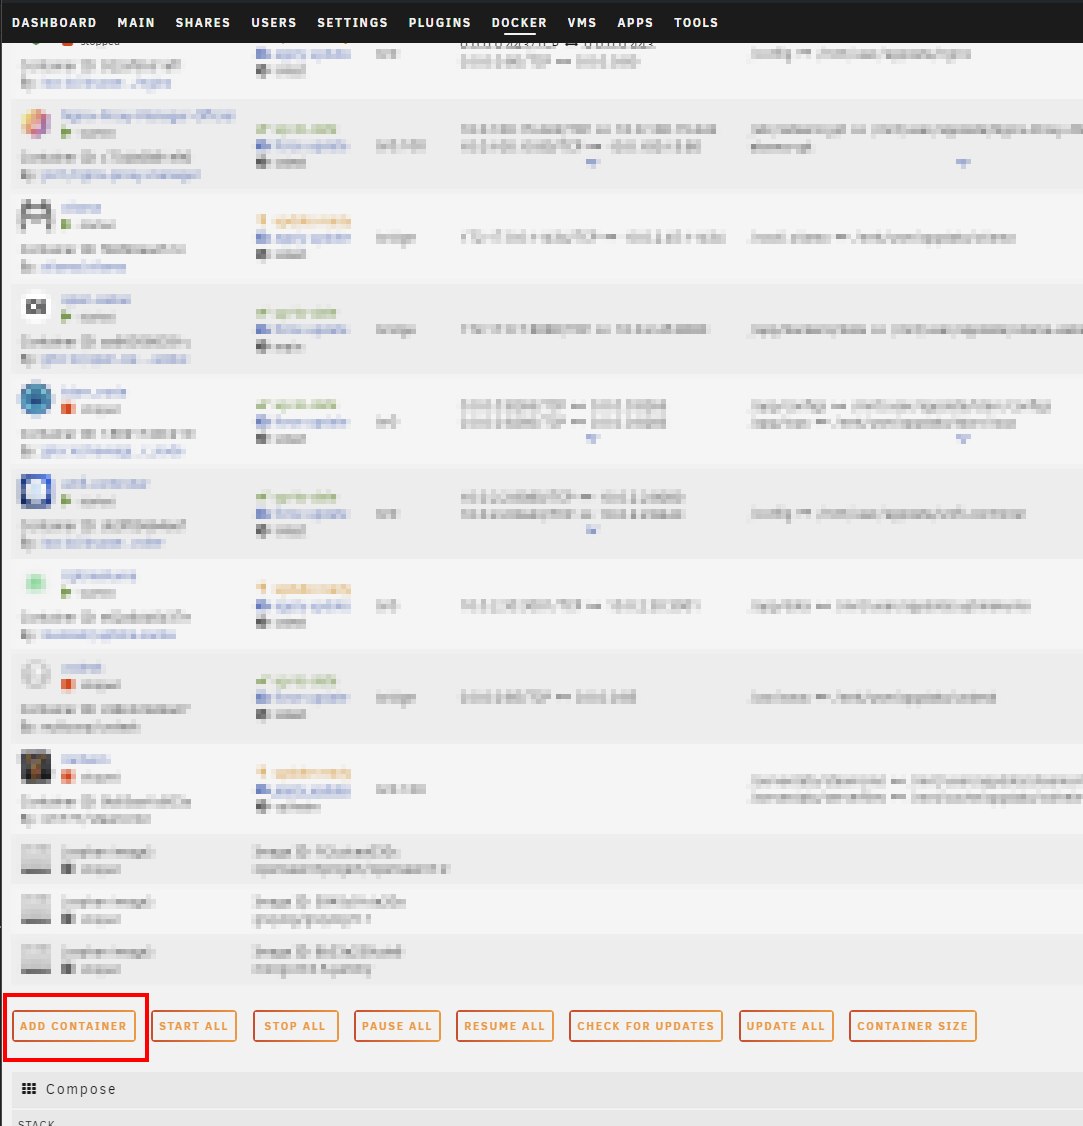
In Unraid navigate to the docker tab and then at the bottom click add container.
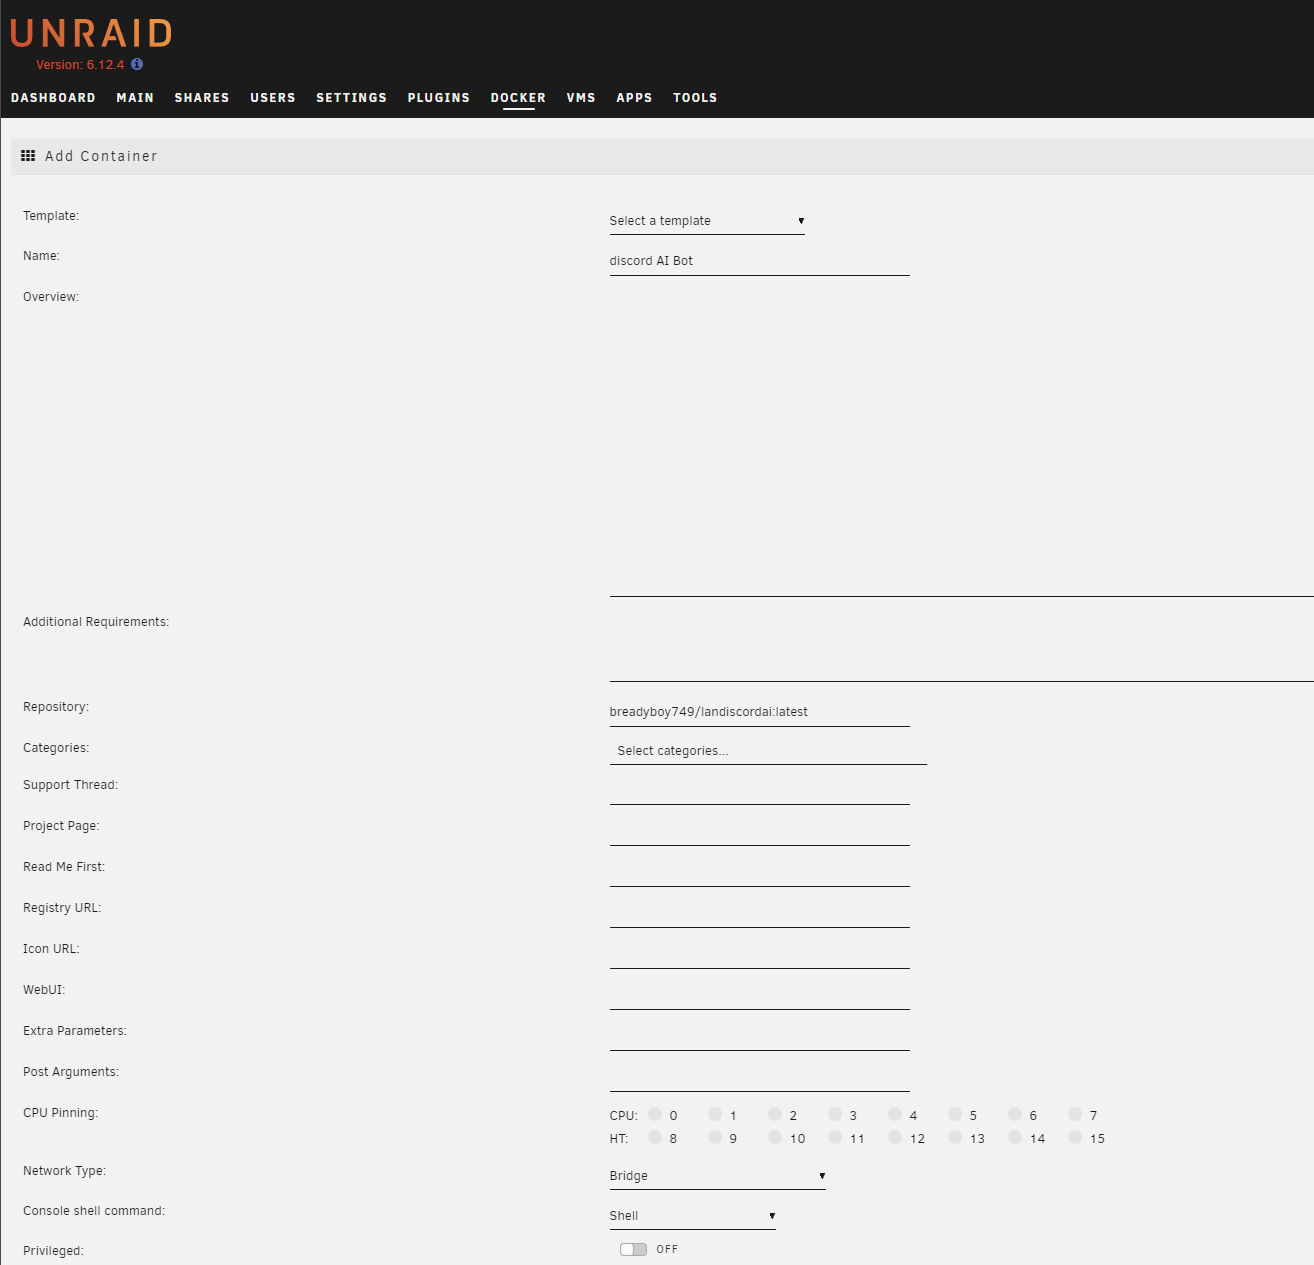
Give the container a name and then input the Docker Hub repository name.
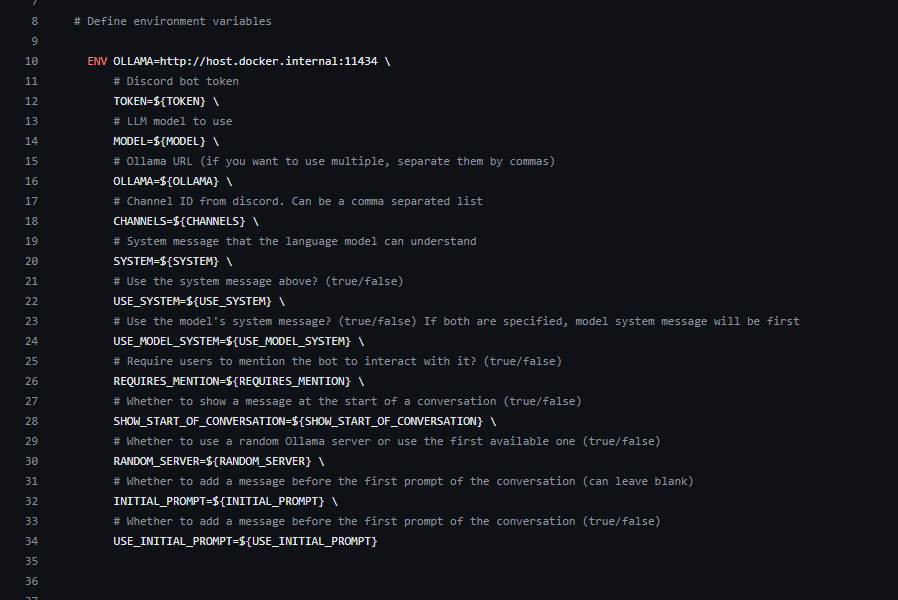
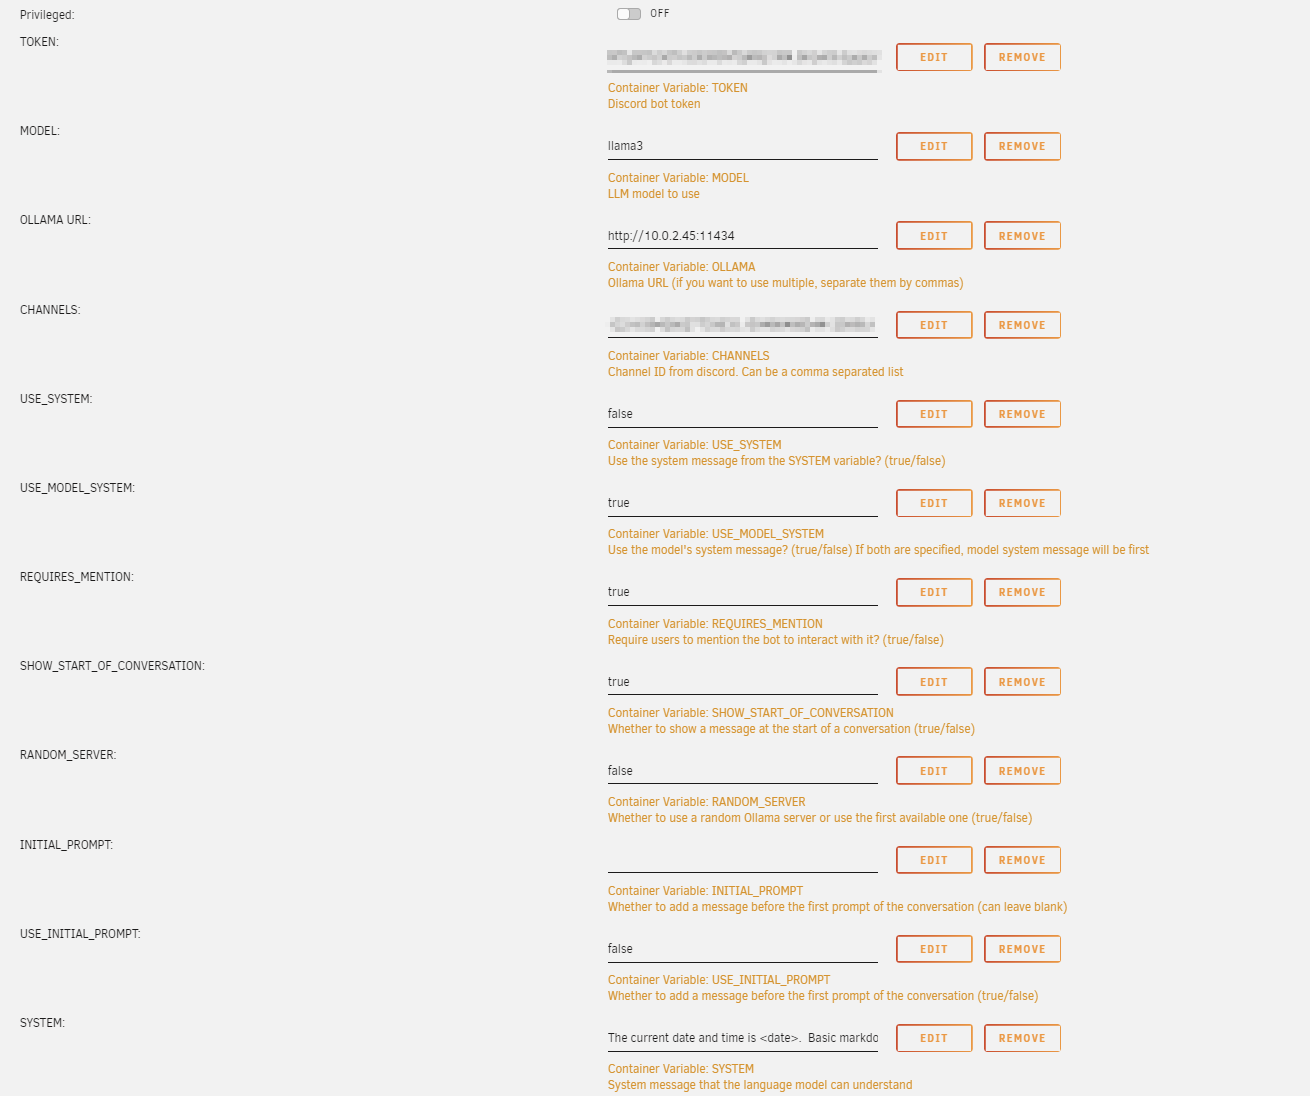
Finally we are going to need to add some variables to our docker container for this to all run as expected. We can copy the variables from the Dockerfile in the github branch that I have and they will need to look like this. Obviously put in your token from your Discord AI bot on the dev page that you created. Also input the channel IDs of the discord text channels you want your bot to operate in.
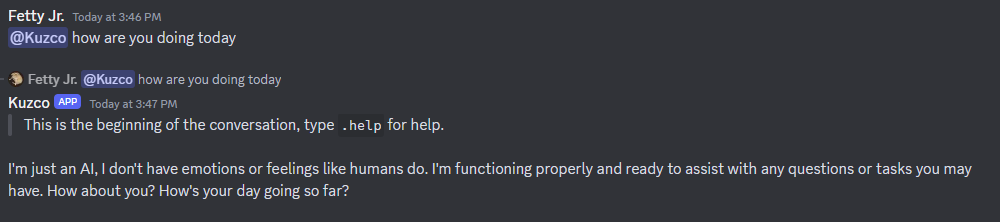
With that completed you can start up your Docker container and you should now see your bot come online in the Discord server that you added it to. You can now @ message the name of your bot and ask it any question you would like. If you reply to the message then you can have a contextual conversation with the bot, otherwise each message starts off like a new conversation.